-
Terratrip Probe Installation카테고리 없음 2020. 3. 2. 03:32
This past weekend I attached a Terratrip speedometer cable electronic pulse generator onto a stand-alone drive cable that I can attach to a wheel in order to drive a rally odometer. In the past I have used this cable to drive mechanical odometers such as a Halda Tripmaster. In order to add flexibility to this cable I wanted to add a pulse generator so that I could use this cable for an electronic odometer as well.
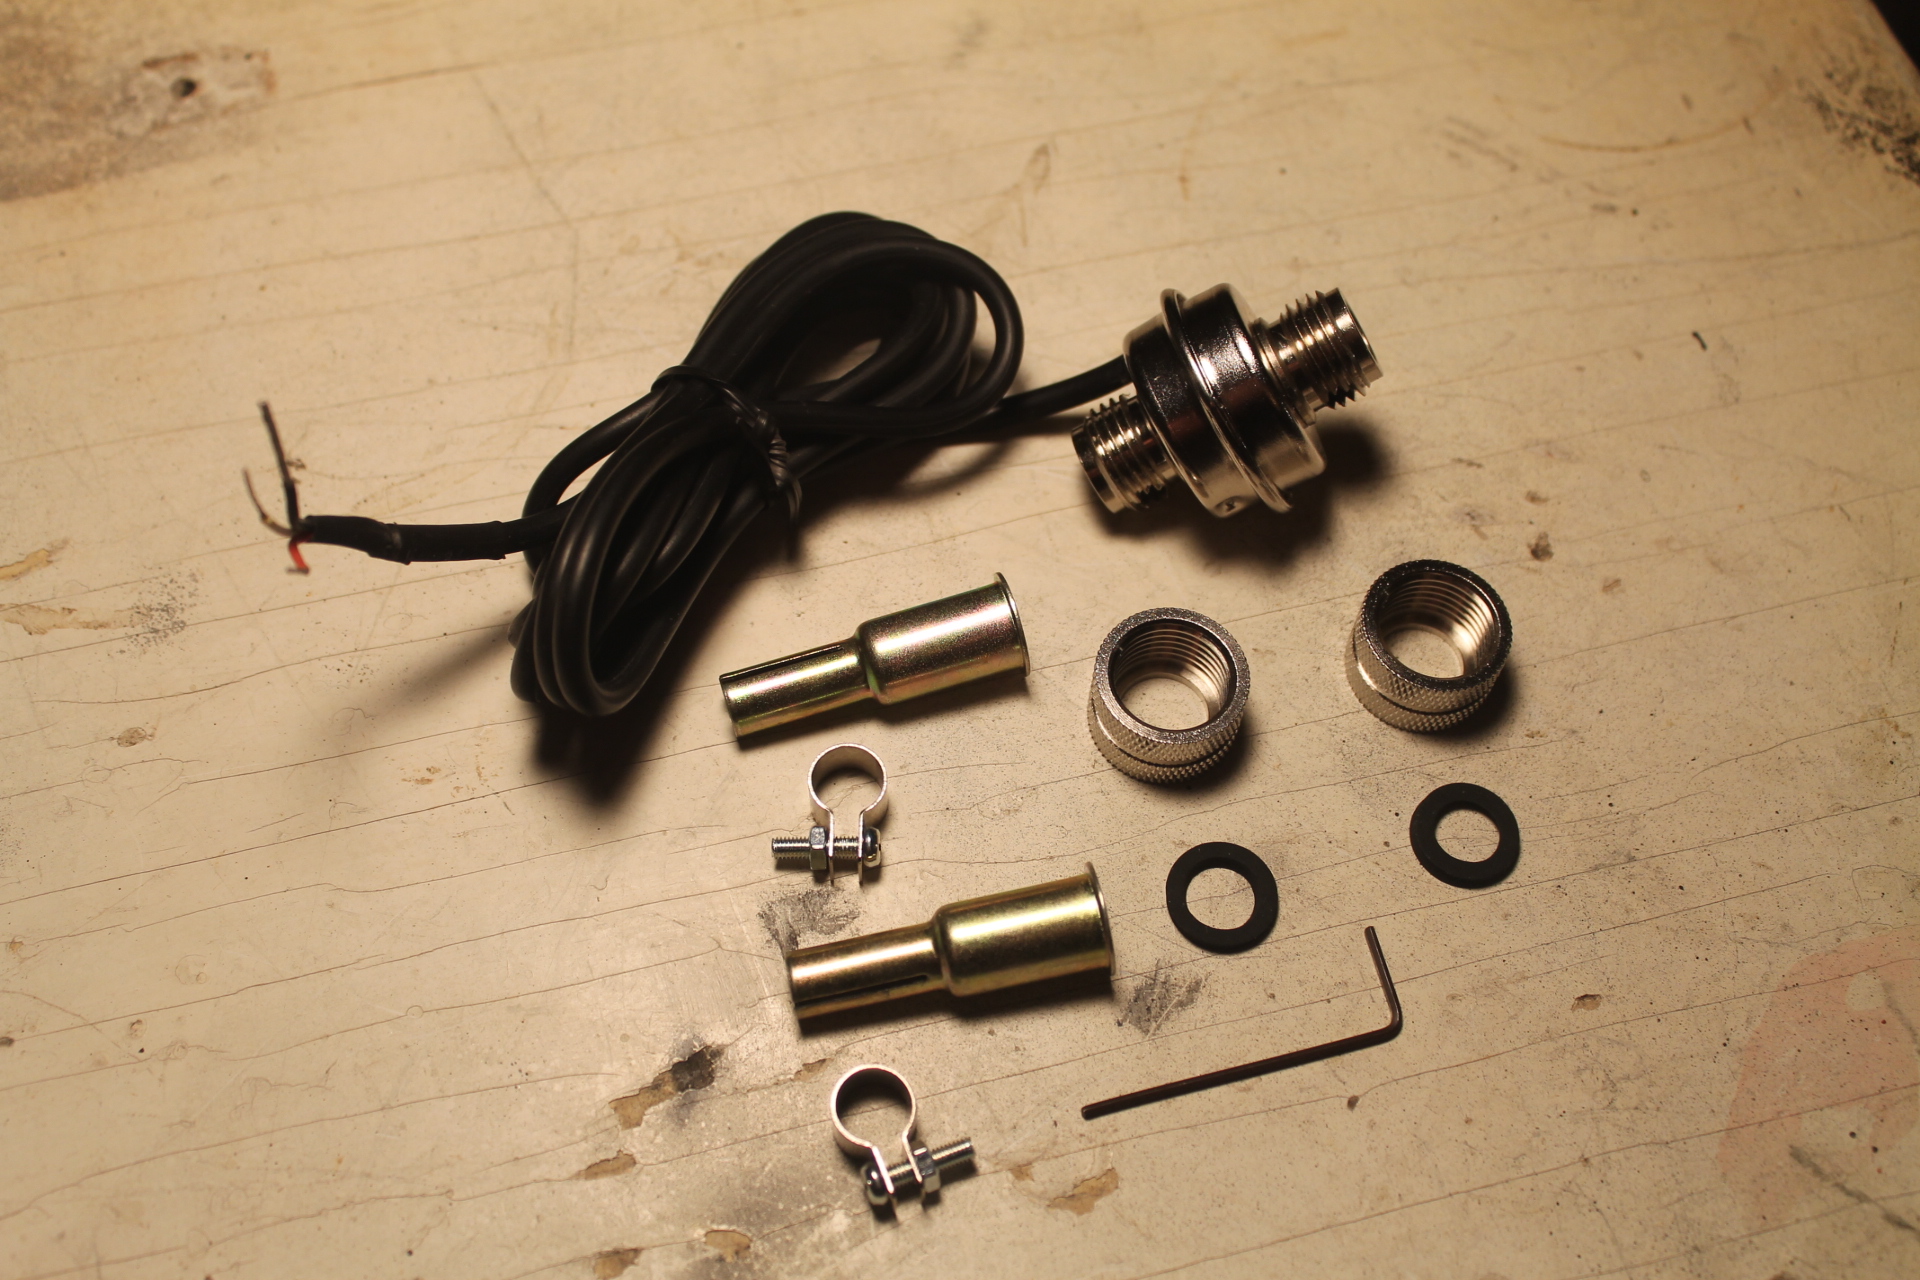
When planning to do this I found that the available instructions were limited, therefore I decided to document my installation in order that it might be helpful to some other person who might be interested in doing the same thing.I obtained the Terratrip speedometer cable pulse generator from Susquehanna Motorsports in Pennsylvania. The complete package includes the items shown in the picture below.The Terratrip Speedometer Cable Pulse Generator ComponentsI had a drive cable that is about 1,800mm (72 inches) with a plain end with a follower nut onto which I wanted to install the Terratrip pulse generator. One end of this cable has a cable driver which can be quickly installed onto a car’s wheel.
This other end of this cable which is then routed into the interior of the car and can be connected to an odometer. The interior end of this cable is shown below.My Base Drive CableThe first thing that I did was to cut the cable casing about 250mm from the end. Be sure to withdraw the central rotating cable from the speedometer cable so that you don’t cut through the most important component of the speedometer cable. I found that a Dremel cut-off wheel works quite well to cut the cable casing.Be sure to measure the length of the pulse generator unit as this is length that is going to be added to the overall drive cable length.
You won’t be adding any length to the rotating cable therefore cable casing must be shortened in order to maintain the existing functionality of the interior end of the cable. If not, the speedometer cable casing will be longer than the rotating cable causing the rotating cable to disappear inside the speedometer cable casing. In this case the pulse generator unit is 40mm long.The Cut End Of The Speedometer Cable CasingI used the Dremel cutting wheel again to cut a 40mm piece from the speedometer drive cable casing to compensate for the length of the pulse generator that would be added to the casing.A 40mm Piece Was Cut From The End Of The Speedometer Cable CasingThe speedometer cable casing has a hollow central flexible metal piece covered with a black polymer coating. A cross-section of the cable casing is shown below.Speedometer Cable Cross SectionThe next thing I did was a two-step process to install the end pieces on the two cut ends of the speedometer cable. The was a little difficult, but it is quite doable.

The first thing that I did was to insert the small end of the end piece fitting between the hollow metal casing and the black polymer coating. I inserted the fitting up to the location of the size change of the fitting. This also indicates that the metal end also extends only to the size change within the end fitting. I needed/wanted to have the end of the hollow metal casing matching up with the end of the fitting. To do this, I took a knife and cut the black polymer coating at the base of the end fitting and stripped about 20mm of coating from the end of the cable.Partially Through The Initial Insertion Of The Cable End FittingThe cable with the end of the black polymer coating stripped off is shown below.A 20mm Portion Of The Black Coating Is To Be RemovedI then slid the clamp, follower nut, and rubber washer over the cable casing, then inserted the cable end fitting onto the cable with the hollow metal end of the speedometer casing extended to the end of the cable end fitting. This is shown below.The Speedometer Cable End Fitting Installed On The CableThe completed shorter piece of speedometer cable is shown below. I repeated the same process on the longer piece of the speedometer cable, therefore I had the end fittings on both ends of the cable.The Completed Smaller Piece Of Speedometer CableNow it was time to fit the pulse generator onto the speedometer cable.
Note that the pulse generator comes with two set screws to attach the central rotating cable to the pulse generator in the new unit. The access to the set screws is through the connection threads on the pulse generator shown below. The unit came with an Allen Wrench to use to tighten the set screws.Access To The Rotating Cable Set Screws Is Through The Connector ThreadsAt this point, the rotating cable can be threaded through the pulse generator.
Terratrip Probe Installation Manual
There was a slight complication as the diameter of the rotating cable was slightly larger in diameter than the central passage through the Terratrip pulse generator. As a result I had to turn to my Dremel drill again to ream and drill out the central passage somewhat in order to allow the rotating cable to pass through the pulse generator. Don’t forget to tighten the set screws on the central rotating cable.Threading The Pulse Generator Onto Speedometer CableThe finished installation is shown on the photo below. This installation will let me use the same drive cable to drive a Terratrip odometer and/or a Halda odometer, both at the same time if I want to.The Installed Terratrip Speedometer Cable Pulse GeneratorI hope that this post helps anyone who might be installing a Terratrip speedometer cable pulse generator.